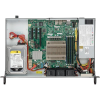
EU ASRock Rack B450D4U-V1LQ5 mATX AM4

Notice: Page may contain affiliate links for which we may earn a small commission through services like Amazon Affiliates or Skimlinks.

luckylinux

Active Member
Mar 18, 2012
608
151
43
could work, depends how the default io shield looks like looks like.
i think so since the original io shield design was for X470 in a supermicro.

as long as the original shield from the case has this 1u shield format size (don't mind the connectors on this supermicro X9SCL-F shield).
View attachment 43408

according to this ebay listing they're similar Supermicro Server Chassis IO Shield SC116 SC512L-200 SC512-200B SC512L-260 SC815 | eBay
but of course no warranty from the designers side :)
Yeah I'm not even sure I can get the other Chassis (it's on some Polish Website and automatic Checkout shows they do NOT ship abroad, although I sent them a Message to ask if they could).

Other Option would be this small Chassis with PSU of dubious Quality included but super-cheap: Chenbro PC-71169 - H05 Slim Micro ATX Gehäuse schwarz Netzteil + DVD RW USB 3.0 | eBay

Or the Fujitsu TX1320 M3, although it requires PicoPSU and also some fiddling with the Front Panel Connector.
 

dbram

Member
Mar 3, 2021
71
45
18
Another small update:

vga to hdmi cable, these are very picky, especially wen entering the bios. got a very cheap vga to hdmi from aliexpress, where only the boot logo for the NIC's PXE is shown, nothing else, no bios, no boot, no post, nothing. according to a video from Techno Tim, who tried something similar on a couple of Supermicro boards, the adapter cables are a bit shady, some work some don't. I ordered one of his recommendations 'Benfei vga to hdmi' and will test with these.
The benfei vga to hdmi adapter arrived.

what works right now:
using a laptop and cheapish usb3 hdmi capture stick using OBS on Windows 11 I can see the bios screen, F11 brings the boot selection menu, and I can see the proxmox console now. that should be enough for my use-cases for the time being.

Still have to try the Raspberry PI / PiKVM route...
ISO mounting is not really a prio right now, using netboot.xyz with local mirrored images for netbooting the installers
downside is, now I really need to get up and running with the esp32-s3 :cool:


Maybe a brainfarth but a potential lowcost approach would be:
for the hdmi capture, csi2 vs usb3 hdmi stick, the usb hdmi seems cheaper. especially since it could be setup using one of the B450 nodes to act as the remote controller node :)

if you own e.g; 12+1 nodes you can use :
  • 12 keyboard hid simulators and atx controls (pi pico, esp32-s3, leonardo, ... ) , still need a pcb for the hardwired atx controls
  • 3 usb hdmi sticks,
  • 3 benfei vga to hdmi adapters,
  • 3x vga 4 to 1 switches,
  • a ryzen 3100 cpu and small memory modules or so in that kvm controller node is more then enough, the encoding is done in the hdmi sticks chips (if I'm not mistaken).
 
  • Like
Reactions: luckylinux

luckylinux

Active Member
Mar 18, 2012
608
151
43
Another small update:

The benfei vga to hdmi adapter arrived.
Where did you Buy it ? What Driver / Chip is it using ? Maybe you can share some lsusb -vvv or usb-devices Output :) .

I just hope that the 23 Pieces for VGA 2 HDMI Adapters I ordered off Aliexpress aren't total Junk. I think it will NOT show the Beginning of POST based on what I read (but if that doesn't work, you have much bigger Problems anyways), but it should be able to enter the BIOS. Assuming it behaves similarly to the Supermicro X11SSL-F of course (which it might NOT).

what works right now:
using a laptop and cheapish usb3 hdmi capture stick using OBS on Windows 11 I can see the bios screen, F11 brings the boot selection menu, and I can see the proxmox console now. that should be enough for my use-cases for the time being.
Nice :cool:. What about from a Linux Desktop though ?


Still have to try the Raspberry PI / PiKVM route...
ISO mounting is not really a prio right now, using netboot.xyz with local mirrored images for netbooting the installers
downside is, now I really need to get up and running with the esp32-s3 :cool:
Similar story here. But to manage a lot of different Netboot Images, I haven't gotten around that yet. I saw there was one or two Projects on Github which addressed some kind of Multi-Boot Setup, but I haven't deep dived into it.

On the other side and similar Topic I was more busy trying to get a Virtual USB Flashdrive working for Proxmox VE Guest.
For those Interested


Maybe a brainfarth but a potential lowcost approach would be:
for the hdmi capture, csi2 vs usb3 hdmi stick, the usb hdmi seems cheaper. especially since it could be setup using one of the B450 nodes to act as the remote controller node :)

if you own e.g; 12+1 nodes you can use :
  • 12 keyboard hid simulators and atx controls (pi pico, esp32-s3, leonardo, ... ) , still need a pcb for the hardwired atx controls
  • 3 usb hdmi sticks,
  • 3 benfei vga to hdmi adapters,
  • 3x vga 4 to 1 switches,
  • a ryzen 3100 cpu and small memory modules or so in that kvm controller node is more then enough, the encoding is done in the hdmi sticks chips (if I'm not mistaken).
Not sure if VGA 4-1 Switches is really worth it, the difference between that and KVM VGA 4-1 Switches is quite small IIRC. Maybe easier to re-purpose them later if you get the full KVM one.

Why do you need such a (relatively) highend KVM Controller Node though ? Wouldn't something like a Raspberry Pi 4 also work ? Or you want to spin up like 3 VMs (or 3 x Containers, LXC or Docker/Podman) one for each "set" and with its own Dedicated USB-HDMI Adapter ?

The part I miss (not specifically for your setup Description, also if I were to do it slightly different) is: can you add a Select/Option like at the Top of the Screen in PiKVM to select your Target Device ? Would be nice to have some Dynamic Configuration Capability so your 3 x VMs / Containers cvan be easily be parametrized and assigned their Respective Capture Device ? It would make it scalable much easier (just spin another Container & add a Config file). Or of course you can have a Single Container with 3 Processes running etc ...

EDIT 1: @dbram, in Terms of Pricing though, if we go with the "Main Node" Approach + ESP32-S3 or Raspberry Pi Pico, then we might even do 1 x USB HDMI Capture Card per each System (so 12 in your Case, 24 in my Case) and a Couple of USB 3 Hubs.

Basically getting rid of the Raspberry Pi 4. And then spin up one container per each System.

The USB HDMI Capture Card is like 5 EUR each (if it works as Intended). The VGA 2 HDMI Adapter I bought was 3 EUR (still need to confirm whether it works as intended though). The Raspberry Pi 4 is like 40 EUR each. Even the Radxa Zero 3E or Radxa 3C.

But of course the Management System does NOT need to be on a Ryzen Node, I think it would work Fine on a Raspberry Pi 4 4GB or so with several Containers, one for each Client System.

Plus the ESP32-S3 / Pico (in any Case) of course :)
 
Last edited:

VirMach

Member
Apr 7, 2025
39
20
8
Jokes aside, I'd say at the very least:
- Be able to access BIOS
- Be able to Issue remote reboots/start/shut-down (need ATX Power Control Board).
- Preferably (at least partially, e.g. Groups of 2/4/8) independent Systems (in your Case if the main Unit gets broken, you lose access to EVERY one of your 88 Devices)
- Target Devices: 24 Devices or Higher (can be 8x4, 4x8, 3x12, 2x12, etc Configuration)
- Preferably HTML5
- Single user, Homelab, nothing too fancy
There's no good solution for your requirements, the closest one seems to be the one you're already exploring which is PiKVM mixed in with whatever else you need. There's a MergePoint KVM switch that's fairly cheap and supports HTML5, but won't do your power controls and the dongles on those are crazy high priced. Only works for single user, for multiple you need an expensive license, which is why it was ruled out for us.

The one I mentioned using, there's technically a way to not use Java but only from Windows (they have some other program.) I do not know for certain if it uses HTML5 or not for that, just that it's not Java so I'd assume it's probably HTML5.

I don't know what you're doing for power on these but if you have a proper PDU set up, then that should end up getting you your power cycling with some type of API/control panel which you should be able to integrate with the KVM switch in most cases, and it should end up costing less per server with a PDU f you get the right one used (at least in the US, we can get 30-48 port PDUs, switched, compatible with our setup, for $100-200.)


----

Not sure what was discussed for I/O shields but if anyone wants an STL file to 3D print some for the SuperMicro Chassis (I think they use the same screws across SC512 and others I have) let me know, not that it's very difficult to just make one yourself. There's also a spray you can get to simulate any benefits you'd be getting in terms of actual shielding versus using metal ones, just make sure to wear proper N95 or whatever when spraying it. Please note, huge disclaimer, I'm not a professional on shielding, I could be totally wrong but the spray is called Total Ground Carbon Conductive Paint, 12 Oz Aerosol - MG Chemicals

You guys could also definitely use the shields they sent and flatten them and cut it to work in the 1U format but I found that method to take longer than it's worth even though I have all the equipment to do it.

I haven't actually found your solution for it so I have no idea if it's way more sensible than mine or not.
 
  • Like
Reactions: luckylinux

VirMach

Member
Apr 7, 2025
39
20
8
This is the STL that I'm using, I left a little slot on top where you can insert a CPU shroud into it should you want to also print one of those, I can give you guys a version without our logo on it.

You can print 4 of them at a time on something like a Bambulab A1 mini 0.4 nozzle at 0.16mm Optimal, in 1 hour 16 minutes.

Versus 2 hours 17 minutes for the one you guys seemed to have found, plus that one needs some work. I actually used that one several years ago, it has some issues getting it in and getting the screws in, the bottom three "clips" kind of get stuck. And I think the VGA port for it was too tight where it'd be more difficult to kind of align it properly in all cases but I might be remembering wrong.

I have a bunch of different versions if you don't want hexagons, logo, or the hole at the top just let me know, this is just the version that prints faster.

EDIT -- the screw holes are definitely the right size and position for SC512/SC813 though, confirmed, same with 3 clips at bottom (aligns properly.)
 

Attachments

  • Like
Reactions: luckylinux

dbram

Member
Mar 3, 2021
71
45
18
it has some issues getting it in and getting the screws in, the bottom three "clips" kind of get stuck. And I think the VGA port for it was too tight where it'd be more difficult to kind of align it properly in all cases but I might be remembering wrong.
Ah yes, that's exactly why I created a new version for it :)
B450d4u 3mf

and this is the changelog of yesterday :)
  • no holes yet for screws. : fixed in v1.5
  • the connectors at the bottom need to be slimmer, fixed in v1.5
  • the margin around the vga connector needs to be increased fixed in v1.5
  • add opening for the top case cover clip : fixed in v1.5


1746619141770.png

Welcome to contribute editing further on the onshape b450 iohsield project
1746619113062.png

FYI: this prints in PETG in under 24 minutes on a K1-max
 
Last edited:

VirMach

Member
Apr 7, 2025
39
20
8
Ah yes, that's exactly why I created a new version for it :)
B450d4u 3mf

and this is the changelog of yesterday :)
  • no holes yet for screws. : fixed in v1.5
  • the connectors at the bottom need to be slimmer, fixed in v1.5
  • the margin around the vga connector needs to be increased fixed in v1.5
  • add opening for the top case cover clip : fixed in v1.5
Wow, I'm kind of impressed I remembered that correctly but I can't remember what I did an hour ago.

@dbram : do you think your solution with the I/O Shield would also work with the Supermicro CSE-512L ? I found some very good Deals on those (not sure if they ship to Denmark though) but not sure if the I/O Shield is replaceable and if there is enough room for everything (Motherboard, Fans, ...) overall since the Chassis is significantly shorter Depth.
There's these Supermicros that are even shorter than the one you mentioned, and we can still fit these boards into them. Found the name for you, although for these I had to take a dremmel and cut out the I/O shield because it was "built in" to the chassis.

SYS-5019S-L

Reference photo:
1746636354137.png


The CSE-512L works fine, we use a ton of them mainly for the X470D4U brother to this board. I also have some fan bracket STLs for them if you want, because the 512 will come with one blower fan that isn't good enough for most Ryzens. Might be OK for your 5700X though, but iit won't blow directly onto it like what it's designed for so you'll need a shroud. Okay maybe not "need" but advised.

You could 3D print a shroud but I found it's easier to get these thin plastic sheets for crafting and origami them.
 
Last edited:
  • Like
Reactions: EasyRhino

luckylinux

Active Member
Mar 18, 2012
608
151
43
There's no good solution for your requirements, the closest one seems to be the one you're already exploring which is PiKVM mixed in with whatever else you need. There's a MergePoint KVM switch that's fairly cheap and supports HTML5, but won't do your power controls and the dongles on those are crazy high priced. Only works for single user, for multiple you need an expensive license, which is why it was ruled out for us.

The one I mentioned using, there's technically a way to not use Java but only from Windows (they have some other program.) I do not know for certain if it uses HTML5 or not for that, just that it's not Java so I'd assume it's probably HTML5.
I see :(

I don't know what you're doing for power on these but if you have a proper PDU set up, then that should end up getting you your power cycling with some type of API/control panel which you should be able to integrate with the KVM switch in most cases, and it should end up costing less per server with a PDU f you get the right one used (at least in the US, we can get 30-48 port PDUs, switched, compatible with our setup, for $100-200.)
I do NOT have a proper PDU. And here in Europe I believe they are CRAZY expensive ...

Not that I would trust the reliability of these cheap Relay that go ON-OFF-ON after a while leading to the Destruction of the Equipment they are meant to serve.
 

luckylinux

Active Member
Mar 18, 2012
608
151
43
Wow, I'm kind of impressed I remembered that correctly but I can't remember what I did an hour ago.


There's these Supermicros that are even shorter than the one you mentioned, and we can still fit these boards into them. Found the name for you, although for these I had to take a dremmel and cut out the I/O shield because it was "built in" to the chassis.

SYS-5019S-L

Reference photo:
View attachment 43426


The CSE-512L works fine, we use a ton of them mainly for the X470D4U brother to this board. I also have some fan bracket STLs for them if you want, because the 512 will come with one blower fan that isn't good enough for most Ryzens.
I just got a quote from Poland. 22 EUR each plus around 8 EUR each Shipping, batches of 5x. Not too bad a 30 EUR everything included I guess ...

From some Pictures online I see a couple of screw and also those latches of the I/O Shield, so it *should* be removable.
 

VirMach

Member
Apr 7, 2025
39
20
8
I just got a quote from Poland. 22 EUR each plus around 8 EUR each Shipping, batches of 5x. Not too bad a 30 EUR everything included I guess ...

From some Pictures online I see a couple of screw and also those latches of the I/O Shield, so it *should* be removable.
It is removable, no worries there for the 512. Have you looked at the rails though? Usually out of stock and expensive. They "droop" a little if you only attach them from the front.

When I say expensive I don't mean direct from Supermicro although more than what you paid for the chassis, they're expensive because they're always out of stock so the market prices.
 

luckylinux

Active Member
Mar 18, 2012
608
151
43
It is removable, no worries there for the 512. Have you looked at the rails though? Usually out of stock and expensive. They "droop" a little if you only attach them from the front.

When I say expensive I don't mean direct from Supermicro although more than what you paid for the chassis, they're expensive because they're always out of stock so the market prices.
That's the Thing ... I don't have a proper rack. Just some of these Samson SRK Series (kind of Video/Audio Racks) and some Steel Shelves.

For Desktop ATX / HTPC type Chassis (such as the Silverstone ML03) I typically need to buy individual Rack Shelves.

But for something that is already in Rack 1U Format, not sure how to do it to be honest. Either I add a Shelf but then it becomes 2U, or I do as you say and it will tilt. Maybe I can engineer some Bracket to help support it from the Back, but since this model is especially short, I don't think that will work.

And Rails are WAY too expensive I think. Probably much more than the Chassis itself :( .
 

VirMach

Member
Apr 7, 2025
39
20
8
That's the Thing ... I don't have a proper rack. Just some of these Samson SRK Series (kind of Video/Audio Racks) and some Steel Shelves.

For Desktop ATX / HTPC type Chassis (such as the Silverstone ML03) I typically need to buy individual Rack Shelves.

But for something that is already in Rack 1U Format, not sure how to do it to be honest. Either I add a Shelf but then it becomes 2U, or I do as you say and it will tilt. Maybe I can engineer some Bracket to help support it from the Back, but since this model is especially short, I don't think that will work.

And Rails are WAY too expensive I think. Probably much more than the Chassis itself :( .
I have a solution if you want to save money, look up "slotted steel" at your local hardware store, then figure out how to cut it and attach for your particular improper rack. As long as they're on top of eachother and you don't plan to take them out it should be fine though. Don't buy rack shelves, there's also these shelves 4-Post rails that don't take up an entire 1U, they're also still expensive, plus thin and flimsy. There's one brand here that isn't flimsy so you at least don't feel that ripped off but it's $40 a pair. All other ones are $25-30 and terrible (fine for 512.) But might as well buy bulk from Supermicro on backorder (similar price, take forever to arrive, but actually slide out.)
 
  • Like
Reactions: luckylinux

luckylinux

Active Member
Mar 18, 2012
608
151
43
I have a solution if you want to save money, look up "slotted steel" at your local hardware store, then figure out how to cut it and attach for your particular improper rack. As long as they're on top of eachother and you don't plan to take them out it should be fine though. Don't buy rack shelves, there's also these shelves 4-Post rails that don't take up an entire 1U, they're also still expensive, plus thin and flimsy. There's one brand here that isn't flimsy so you at least don't feel that ripped off but it's $40 a pair. All other ones are $25-30 and terrible (fine for 512.) But might as well buy bulk from Supermicro on backorder (similar price, take forever to arrive, but actually slide out.)
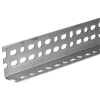
Is it a L-Profile in Steel or Aluminum you mean, just perforated ?

1746637556685.png
 

VirMach

Member
Apr 7, 2025
39
20
8
Is it a L-Profile in Steel or Aluminum you mean, just perforated ?
Yep, those. Except you put it on the other way around than the photo for that one. The holes are convenient for using nuts/bolts where needed to attach it to the front and back. You'd combine it with something like this:


Don't quote me on that exact one but you should be able to picture what I mean in your head, that attached to your steel L bracket on both ends, then attaches to your cabinet. Or however way you make it work and you end up saving a ton of money.
 

luckylinux

Active Member
Mar 18, 2012
608
151
43
Yep, those. Except you put it on the other way around than the photo for that one. The holes are convenient for using nuts/bolts where needed to attach it to the front and back. You'd combine it with something like this:


Don't quote me on that exact one but you should be able to picture what I mean in your head, that attached to your steel L bracket on both ends, then attaches to your cabinet. Or however way you make it work and you end up saving a ton of money.
And then you also screw it into the Chassis as it were a Rails or ? Or you just have the lower part of the "L" be where you lie the Chassis ?

Not sure we mean the same Thing. I was thinking front/back when you said "on both ends" (hence my Question about screwing it into the Chassis as well), but maybe you were Thinking left & right with "on both ends".
 

VirMach

Member
Apr 7, 2025
39
20
8
And then you also screw it into the Chassis as it were a Rails or ? Or you just have the lower part of the "L" be where you lie the Chassis ?

Not sure we mean the same Thing. I was thinking front/back when you said "on both ends" (hence my Question about screwing it into the Chassis as well), but maybe you were Thinking left & right with "on both ends".
You don't screw it into the chassis, you just install them like 4 post static rails which means each "rail" is screwed into the front and back posts for a total of 4 posts, and then since it's an L bracket, your server "slides" in and the brackets hold it. Basically like it's a shelf per server.

Then if you really want you screw in your server from the front like you normally would just as extra support in case your homemade rails fall apart.

EDIT -- Example photo, your server would slide in on top of it like this:

1746639215535.png
 
Last edited:
  • Like
Reactions: luckylinux

luckylinux

Active Member
Mar 18, 2012
608
151
43
You don't screw it into the chassis, you just install them like 4 post static rails which means each "rail" is screwed into the front and back posts for a total of 4 posts, and then since it's an L bracket, your server "slides" in and the brackets hold it. Basically like it's a shelf per server.

Then if you really want you screw in your server from the front like you normally would just as extra support in case your homemade rails fall apart.
I think I see what you mean. The Advantage being that it only takes a couple millimeters and not a full 1U Space of course (compared to a Shelf).

I also think I see how you attach the L profile to the End using the Bracket you suggested.

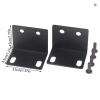
I wonder if something cheaper like these would also work (longer would of course be better):
1746639431339.png

Although in the Front, if I want to screw the Server Chassis in, that would basically use the same Holes as for the Rail, wouldn't it ?

Then that would NOT work since I would need to unscrew the L-Profile and Bracket first, put the Server in, then screw Server+Bracket+L-profile together.

Not an Issue if I don't want to screw the Server Chassis to the Rack of course.
 

VirMach

Member
Apr 7, 2025
39
20
8
Although in the Front, if I want to screw the Server Chassis in, that would basically use the same Holes as for the Rail, wouldn't it ?
I know exactly what you mean, so there's be 3 holes right? You screw in the top and bottom for the brackets. Preferably less "bulky" head screws.

Then, you slide on your server, and screw it in the remaining middle hole, with a slightly longer screw (optional.)

If you get the right length gauge bracket and screw everything in tight, the chassis plus motherboard and everything doesn't weight that much, so steel should hold it just fine, there's no real need to screw it in but the option is there. EDIT -- With steel, we've only ever had to also screw in something like a 4U server that weighs 50LBs+ when using these types of rails.

I wonder if something cheaper like these would also work (longer would of course be better)
My only gripe with these would be that they're black. Which usually means they're usually not high quality steel. Which means they can bend/warp. And the final issue is that since it's only two holes, you'd need to put in your third hole if you want to also screw in the server.

Then that would NOT work since I would need to unscrew the L-Profile and Bracket first, put the Server in, then screw Server+Bracket+L-profile together.
Don't do it this way by the way, that'd be like trying to slide in a DVD player on a shelf under your TV, so you take out the shelf, screw the DVD player on the shelf and then put it back in. :p
 
  • Haha
Reactions: luckylinux

luckylinux

Active Member
Mar 18, 2012
608
151
43
I know exactly what you mean, so there's be 3 holes right? You screw in the top and bottom for the brackets. Preferably less "bulky" head screws.

Then, you slide on your server, and screw it in the remaining middle hole, with a slightly longer screw (optional.)

If you get the right length gauge bracket and screw everything in tight, the chassis plus motherboard and everything doesn't weight that much, so steel should hold it just fine, there's no real need to screw it in but the option is there.
If there is a third Hole. Or I can just drill a 3rd Hole :D .

My only gripe with these would be that they're black. Which usually means they're usually not high quality steel. Which means they can bend/warp. And the final issue is that since it's only two holes, you'd need to put in your third hole if you want to also screw in the server.
Yeah, those are more mean for a small 1u Network Switch I believe.

I struggle to find reasonably priced Stuff here in Europe to be honest though. I was just having a look at the Hardware store but then it cannot be the one with the Reinforcement in the Corner (otherwise it wouldn't fit anymore) and therefore it would be just "weak". I would probably have to but 2 single Screw ones instead of each Bracket basically. Thus it would get even more flimsy.
 

luckylinux

Active Member
Mar 18, 2012
608
151
43
@VirMach: I ordered those Brackets from Supermicro after I sent an Offer to the Seller (8$ / Set of 10x) that he accepted. Turned out to be around 2.6 $ / Pair shipped & including VAT. Not too Bad I guess (22.5 USD plus VAT & Shipping -> 8 USD plus VAT & Shipping).

More or less what the Aliexpress black Bracket was basically :cool: .

Now trying to get the Chassis confirmed :cool: .