Gigabyte MJ11-EC1 EPYC 3151 Mystery

Notice: Page may contain affiliate links for which we may earn a small commission through services like Amazon Affiliates or Skimlinks.

serialintruder

New Member
Dec 19, 2023
12
2
3
Is it worth to spend that much in cabling+risers for such low priced MB?
Is it ok using such low cost cabling+risers with such a professional hardware?

SURE. dont compare the mb price from today, with the adapters. compare the price of a complete system and with a similar itx system from asrock. you will be surprised
 

ilmari

New Member
Jan 23, 2024
17
4
3
Good you are on your way.

First a warning. This can potentially brick your system. I have had one side effect. The product name disappeared from the BIOS and instead there is a text "To be filled in by OEM" It does not seam to have any impact on running the system.

I did all my testing with the main CPU off, only the BMC powered. I suggest you do the same!

If you are logged in as sysadmin you should have root access (meaning you can do anything on the system)
you should have a normal Linux prompt.

type id to confirm that you are root

Bash:
sysadmin [/conf/user_home/peter]# id
uid=0(sysadmin) gid=0(sysadmin) groups=0(sysadmin),109(kvm),501(ipmi),505(lanadmin),511(serialadmin),533(SmashCLP),539(vmedia)
now you need to change to the tmp directory

cd /tmp

It is the file SKU.xml in the tmp directory that we need to edit. First list its contents with

cat SKU.xml

In this there are 3 changes to make
G431-MM0-OT to MJ11-EC0-00 in 2 places
MJ11-EC1-OT to MJ11-EC0-00 in 2 places
G431_MM0 to MJ11

The xml file is just one long row so difficult to edit with vi etc. Best is to use sed.
I just tested these commands and they worked. Note the difference of Zero (0) and the letter O

sed -i s/G431-MM0-OT/MJ11-EC0-00/g SKU.xml
sed -i s/MJ11-EC1-OT/MJ11-EC0-00/g SKU.xml
sed -i s/G431_MM0/MJ11/g SKU.xml

now you can do

cat SKU.xml

to verify that the changes have been made
The next step is to run

bmcprog WS=FULL_AREA

this will create SKU.BIN
verify that it is created

cat SKU.BIN

should produce a lot of garbage (it is a compressed file)

Now this file should be flashed with the following command

skurw w flash SKU.BIN

to verify you should run

rm SKU.xml
skupioneer

This will produce some errors but give you a new SKU.xml

verify that this has the 5 changes by doing

cat SKU.xml

If this is OK that you should now reboot the BMC. But first turn on logging in Putty, it can be good to see what happens.
reboot by simply doing

reboot

During the reboot the BMC should generate the new FanPolicy and all 3 fans should be there!

If this is not working maybe the SKU.BIN file needs to be edited. It has an embedded zipped file mysku.xml.gz
that contains the SKU.xml file. If this is the case I will give instructions for that.

If everything works out start up the main CPU and watch the sensors page in the BMCGui

BR
Peter
I also did this yesterday. Got 2 issues. First one was related to the TTL adapter, which refused to work on my Win10 pc. Then I realized that the driver for the adapter (pl2303) is included in linux kernel, and after switcing to my linux laptop I was able to connect. The other issue was more interesting, as for some reason the new SKU.xml wasn't produced on running skupioneer for the first time. I did the steps again, and this time SKU.xml was produced. Everything works fine and now I can control the fans. Like whcvip, I also have the board name unchanged.
 
  • Like
Reactions: PeterF

jxta

New Member
May 4, 2021
12
1
3
Is there a way to fetch power for a SATA disk from this board? Ill be using the 2x4 Pin 12v connector, but the disk also requires 5v.
 

ilmari

New Member
Jan 23, 2024
17
4
3
Is there a way to fetch power for a SATA disk from this board? Ill be using the 2x4 Pin 12v connector, but the disk also requires 5v.
What kind of PSU are you using if it doesn't have a sata connector? If you have any interest of keeping your data safe and clean, I'd suggest you to use sata connector from PSU to keep voltages stable. Or use m.2 nvme disk and then connect the optional 10Gbit using sff-8654. You'll need a 2x4pin to power the board only.
 

whcvip

Member
Mar 9, 2022
44
18
8
Denmark
Anyone tried running SAS drive of the SlimSAS 4i to 4x SATA cables? My Jonsbo N3 case does have SAS support/plug for the backplane, but if it works with SAS drives and this motherboard, thanks the question.

Very good price for MG09 18TB SAS drives on eBay, would be amazing if I could use those.
 

Gymnae

New Member
Nov 20, 2023
21
3
3
Regarding SlimSAS i8 to PCI-e adapter, the following adapter is now available for customers in the EU. I plan to order two to Germany, since shipping is quite expensive. Not sure it it will work, but so far all cables and BIOS versions did not work with my dual x8 PCI-e adapter.
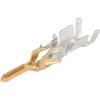
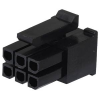
Two of those arrived today and I'm facing an issue: No idea how to deliver power to them. I believed it would be a 6-PIN GPU plug, but the pitch is smaller. Anybody an idea, what kind of connector this is?
EDIT: Looks like "Molex Micro-Fit 3.0" - which I sadly find very few to be easily available
 
Last edited:

lithdk

New Member
Feb 6, 2024
2
1
3
This is my build so far, I plan to build two identical servers in the Jonsbo N3 cases. Im limited in space for these servers, and this is pretty much what I have room for currently (replacing 4 smaller 4-bay nas servers). So want to run 8x SATA HDD/SDD and have a GPU build in and have either 10G Base-t or 25G SFP28 NIC. With only 2x PCIe openings in the case, and the nature of this motherboard, with the SlimSAS 8i kind of getting in the way of the first opening, I have to be a little creative to get i all fitted inside.

I went with cheap used SFX PSU's, after testing be quit! 450w and another Chieftec 550W SFX PSU's (the fan on those was loud, especially the Cheiftec one), I ended up trying this one from eBay, near silent, pretty effective (better than the two others I tried). Just around 25W idle in Unraid, that is with 4 case fans and 64GB RAM. 3-year warranty claim from the seller. So bought several of these, so I can swap them out should anything happened seller accepted 20 EUR each for 6 of these.


View attachment 34155

Bought the cheapest 4x SATA to 4x SATA and MiniSAS to 4X SATA I could find on Aliexpress, and all cabling to the backplane fits nicely underneath the motherboard, so Pretty nice cable management in this case.

View attachment 34156
View attachment 34157

I/O Shield of curse from this thread, just makes it look so much nicer, and should also prevent some dust accumulation.

View attachment 34158

Noctua fans on top NF-A8 PWM, and in the HDD area I use Arctic F9 PWM PST CO. The Noctua one I already had, and since I want to go for value in this build, the Arctic hopefully will work just fine, and cost roughly a third of the Noctua counterparts. The little 60mm fan is kind of loud, so have ordered some AVC fans of Aliexperess, very cheap and hopefully they are original Hydraulic Bearing ones, but even if they are the Ball Bearing ones I am happy at that price.

View attachment 34159

To get the GPU and NIC fitted inside I made this franken-bracket of a Supermicro standard tall bracket from a 3U server, and a tall bracket for my NIC, so that I can mount the NIC upside-down, and this way have room for the SlimSAS 8i plug underneath the NIC (got a 90 degree angled plug SlimSAS cable), and route the riser cable from the m.2 adapter underneath the NIC as well. Think this will work quite well. Though the spacing between the GPU back PCB and the NIC back PCB is a little close to eachother, not contacting, but I am thinking about putting some thermal pads in between just to be 100% safe that they don't contact and shorten out something.

View attachment 34163
View attachment 34160
View attachment 34161
View attachment 34162
View attachment 34164

So am getting pretty close to a final build here, just the fan on the CPU, and maybe some thermally controllable fan adapters, since I cannot find a way to control the HDD/SSD fans according to the HDD temps, not in BMC, and so far not in Unraid, so maybe better to thermally control those fans. And maybe make a smaller/better adapter for the 4-pin plug on the motherboard. I have some new plugs, so could maybe mod the PSU, to make a dedicated cable to the motherboard instead of the 20-pin adapter, that takes up quite allot of space in the case.

Any recommendations are very welcome. And please share your build progress :).
Thank you for the great write up and the youtube video. I was a bit on the fence about this board while researching it, but after stumbling across your video and this thread I went for it and I got 3 boards incoming! Also in Denmark
 
  • Like
Reactions: whcvip

domsepay

New Member
Dec 20, 2023
2
3
3
Two of those arrived today and I'm facing an issue: No idea how to deliver power to them. I believed it would be a 6-PIN GPU plug, but the pitch is smaller. Anybody an idea, what kind of connector this is?
EDIT: Looks like "Molex Micro-Fit 3.0" - which I sadly find very few to be easily available
The two I ordered last week also arrived today, and I’ve asked myself the same question. I think I’ve found the right cable: Link. Jacob had them available for around 36€. I will report back as soon as they’ve arrived.
 

Gymnae

New Member
Nov 20, 2023
21
3
3
The two I ordered last week also arrived today, and I’ve asked myself the same question. I think I’ve found the right cable: Link. Jacob had them available for around 36€. I will report back as soon as they’ve arrived.
Ha, that look slike a nice find and pin compatible. Wondering if the pinout is the same. on ebay you can find the 6pin to 6pin for 7 EUR
 

serialintruder

New Member
Dec 19, 2023
12
2
3
Or this one?
0,31€ 1707260751071.png


Pins 0,30€ for DIY

1707260814546.png

it is not that much work, but i´m lazy. i would direct connect to the conectors back,or remove the connector at all.
then cost is 0 if i use a standard cable to psu.


Best solution would be the 6,99 even if we have to change the pins.
 

Gymnae

New Member
Nov 20, 2023
21
3
3
The two I ordered last week also arrived today, and I’ve asked myself the same question. I think I’ve found the right cable: Link. Jacob had them available for around 36€. I will report back as soon as they’ve arrived.
The factory sent me this image to explain the pinout. It is NOT default 6-pin PCI-E, which is 3x 12v and 3x GND.
So beware, when connecting a molex or GPU 6-pin power connector. I think it would fry the adapter.
It looks like one has to introduce resistors or buck converters to lower 12v to 3v, or adapt an SATA power to 6-pin connector. SATA pins 1-3 deliver +3.3V, 4-6 deliver GND and 13-15 +12V

This is getting a bit off-topic, sorry for that
 

Attachments

Last edited:

jxta

New Member
May 4, 2021
12
1
3
So my builds look like this one, I bought 5 to replace my old mini itx boards and they work really nice so far. The challenge is the connection between the 10Gb mellanox cards and the MB. I can cut the metal profile and add a small riser cable to connect the NIC to "somewhere". Does anyone know if its possible to plug it in the mini sas HD port? Otherwise I dont see how to fit it xD

Maybe this connector could work
P8XF014CXXPYY
Mini-SAS HD (SFF-8643) 4i plug to PCIe x8 (x4 mode) Slot 85ohm Cable w/SATA 15pin Power
From: P8XF014C | Mini SAS HD (SFF-8643) 4i plug to PCIe x8 Slot (x4 mode) Cable w/SATA 15pin Power | PCIe Bifurcation | P8XF014CXXPYY
 

Attachments

Last edited:

mrpasc

Well-Known Member
Jan 8, 2022
487
259
63
Munich, Germany
Does anyone know if its possible to plug it in the mini sas HD port? Otherwise I dont see how to fit it xD

Maybe this connector could work
P8XF014CXXPYY
Mini-SAS HD (SFF-8643) 4i plug to PCIe x8 (x4 mode) Slot 85ohm Cable w/SATA 15pin Power
From: P8XF014C | Mini SAS HD (SFF-8643) 4i plug to PCIe x8 Slot (x4 mode) Cable w/SATA 15pin Power | PCIe Bifurcation | P8XF014CXXPYY
this board does not have any Mini-SAS HD (SFF-8643) port. There is one Slim-SAS x4 port which can be configured to be either 4x SATA or PCIE x4 and a Slim-SAS x8 port which is PCIE x8 (no bifurcation possible).
So the cable you selected will not work.
The threat has several solutions discussed to use those available ports including adapters and cables that work.
 

ilmari

New Member
Jan 23, 2024
17
4
3
In case you already use an ATX PSU and the adapter supplied by Ram-Konig, you can fetch the needed 12v and 3.3v straight from ATX connector. The GPU and CPU power connectors don't help as they don't provide the needed 3.3v.
 

ilmari

New Member
Jan 23, 2024
17
4
3
Yeah, kinda. Although I wouldn't call it sense pin, as it has nothing to do with CPU/GPU connector. Instead, it is called Micro-Fit 3.0. @hmartin gave me great intel about the connector, and perhaps he could share some of his knowledge to you too, as that Ceacent board is becoming more popular among us.